> ## Documentation Index
> Fetch the complete documentation index at: https://docs.simulant.tech/llms.txt
> Use this file to discover all available pages before exploring further.
# Build a cohort
> Define the audience you want to reach — from source data, demographic filters, and data-backed psychographic tags.
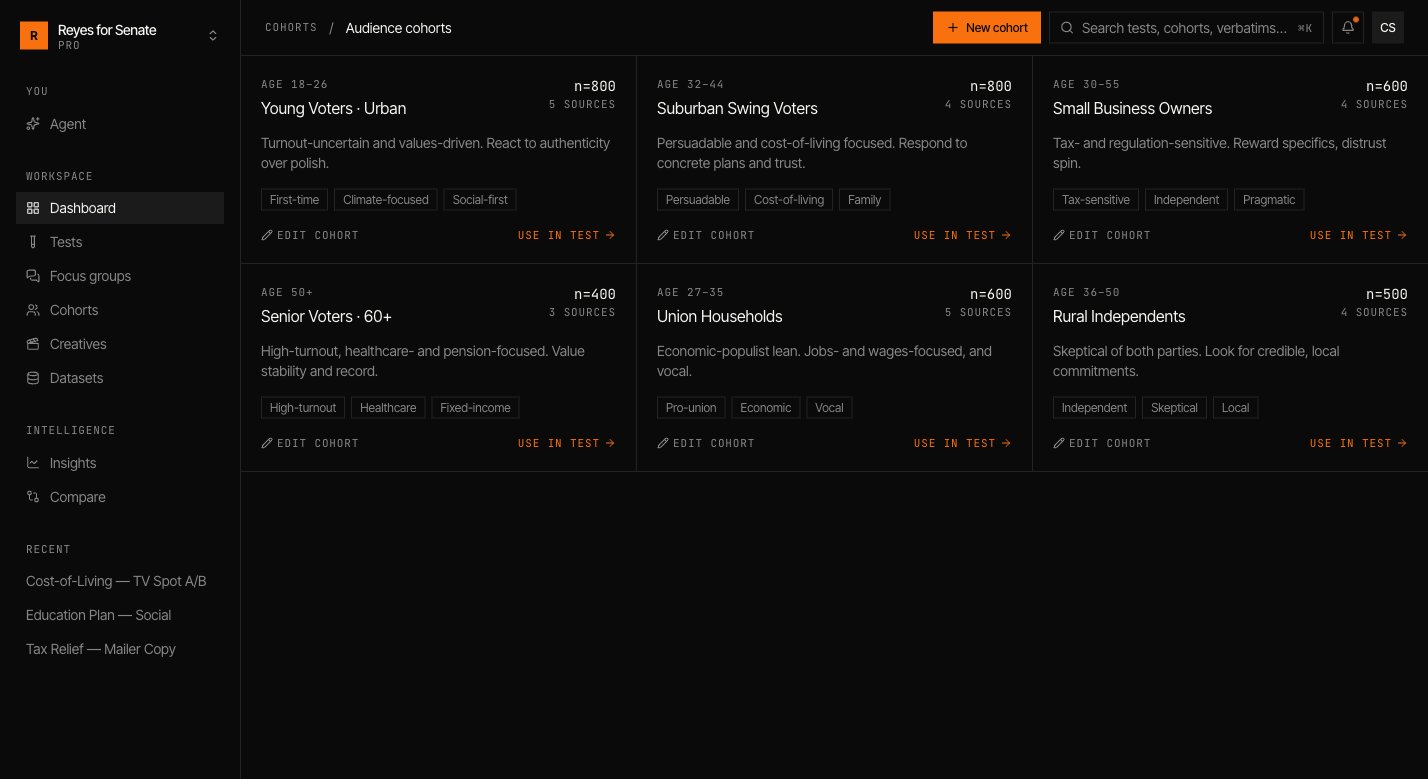
A **cohort** is the audience a test or focus group runs against. It's a slice of the grounded population, defined by the data it's built from and the filters you apply. Every cohort reports a sample size (`n`) so you always know how many personas stand behind a result.
 ## Create a cohort
Go to **Cohorts → New cohort** and work down the builder. A live preview on the right shows the sample size and an example respondent as you refine.
## Create a cohort
Go to **Cohorts → New cohort** and work down the builder. A live preview on the right shows the sample size and an example respondent as you refine.
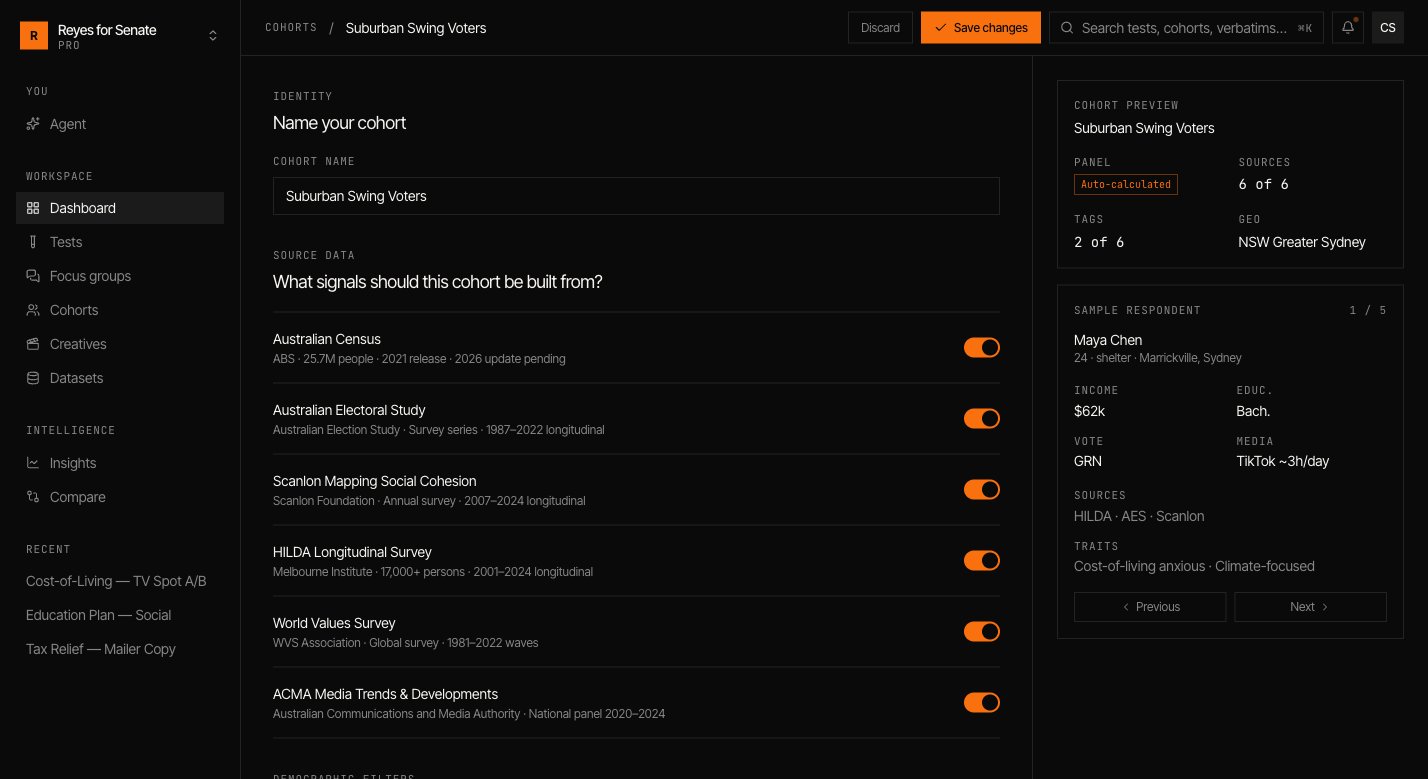 Give it a name you'll recognize later, such as `Suburban Swing · Undecided`.
Under **Source data**, toggle which datasets this cohort is built from. Turning a source off removes its signal from the personas. See [Datasets](/data/datasets).
Narrow the sample by **age range**, **gender**, **state or territory**, **income**, **household**, and **education**. Leave a filter as **Any** to keep it open.
Select **data-backed tags** — attitudes and dispositions such as `Cost-of-living anxious` or `Climate-focused`. Tags are grounded in the source data, not guessed.
Click **Create cohort**. It's now available to any test or focus group in the workspace.
Keep cohorts focused. A tight, well-defined cohort produces sharper segment cuts than one broad audience — and you can always build several and compare them.
## Sample size
As you filter, Simulant shows the available sample size (`n`). When you run a test, you choose how many personas to draw from the cohort; the panel is capped at the cohort's total. Larger samples tighten the confidence of quantitative measures; smaller samples run faster.
## Editing and reusing cohorts
Open any cohort from **Cohorts** to adjust its sources, filters, or tags and **Save changes**. Cohorts are reusable across tests and focus groups, which keeps results comparable — running two creatives against the same cohort is a clean like-for-like read.
## Next
Upload the asset you want this cohort to react to.
Put your cohort to work.
Give it a name you'll recognize later, such as `Suburban Swing · Undecided`.
Under **Source data**, toggle which datasets this cohort is built from. Turning a source off removes its signal from the personas. See [Datasets](/data/datasets).
Narrow the sample by **age range**, **gender**, **state or territory**, **income**, **household**, and **education**. Leave a filter as **Any** to keep it open.
Select **data-backed tags** — attitudes and dispositions such as `Cost-of-living anxious` or `Climate-focused`. Tags are grounded in the source data, not guessed.
Click **Create cohort**. It's now available to any test or focus group in the workspace.
Keep cohorts focused. A tight, well-defined cohort produces sharper segment cuts than one broad audience — and you can always build several and compare them.
## Sample size
As you filter, Simulant shows the available sample size (`n`). When you run a test, you choose how many personas to draw from the cohort; the panel is capped at the cohort's total. Larger samples tighten the confidence of quantitative measures; smaller samples run faster.
## Editing and reusing cohorts
Open any cohort from **Cohorts** to adjust its sources, filters, or tags and **Save changes**. Cohorts are reusable across tests and focus groups, which keeps results comparable — running two creatives against the same cohort is a clean like-for-like read.
## Next
Upload the asset you want this cohort to react to.
Put your cohort to work.